+86-755-88868631
4.9 GOOGLE RATING
+86-755-88868631
4.9 GOOGLE RATING
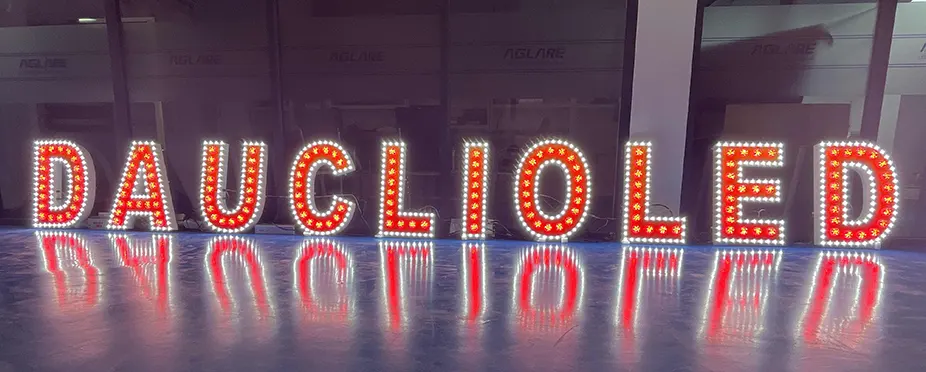
LED channel letters are among the most technically demanding products in the sign-making industry. The combination of metal fabrication, precision cutting, acrylic forming, and LED electrical assembly requires a range of skills and equipment not found in every sign shop. This guide walks through the complete manufacturing process — useful both for sign makers assessing their own capability and for buyers wanting to understand what they are paying for.
Essential:
CNC router: For acrylic face cutting and aluminum back pan cutting
CNC bending brake (or manual brake for smaller shops): For forming aluminum return channels
TIG or MIG welder: For joining stainless steel letter forms
Letter bender (return bending machine): Dedicated tool for bending 50-100mm aluminum channel into letter shapes
LED strip cutter: Precision cutting of LED strip at correct intervals
Riveting tools and pop rivets: For joining aluminum components
Spray paint booth (or powder coating arrangements with a sub-contractor)
Recommended:
CO₂ laser cutter: Far more precise and faster than CNC router for acrylic and thin aluminum
Vinyl cutter: For face vinyl graphics and color-change films
LED test bench: To pre-test LED strip sections before assembly
Letter Returns (Sides)
Aluminum return (most common):
Material: 1.0–1.5mm aluminum sheet
Finish: Powder-coated in any RAL color
Stainless steel return (premium):
Material: 1.0–1.2mm 304 stainless steel
Finish: Brushed (2B or hairline) or mirror polished
Used for halo-lit and premium front-lit letters
Letter Back Pan
Material: 1.0–1.5mm aluminum sheet
Typically painted white (interior) for maximum light reflectivity
Pre-drilled for mounting and cable entry
Letter Face
Material: 3mm–5mm acrylic sheet
Translucent grades for front-lit; solid color or opaque for halo-lit
Thickness: 3mm for letters up to 600mm tall; 5mm for larger
LED Strip
COB strip (preferred for uniform face illumination): 24V, 480–720 chips/m, IP65
SMD 2835 strip (budget alternative): 24V, 120 LEDs/m, IP65
Both must be self-adhesive backed for installation inside the letter
The sign file must be converted to a vector format suitable for CNC cutting. Key considerations:
Minimum letter stem width: 60mm for 100mm depth; wider for deeper letters (structural rigidity)
Minimum internal radius on curves: matched to the letter bender’s minimum radius capability
Font stroke width must accommodate the LED strip and internal wiring
The acrylic face is cut on the CNC router or laser to the exact letter outline. Laser cutting produces smoother edges and requires less post-processing. The face is typically cut slightly larger than the return footprint so it overlaps the return edge by 3-5mm for a clean aesthetic.
The aluminum or stainless steel return is formed into the shape of the letter perimeter using the letter bending machine. This step requires skill — the return must follow the letter contour precisely, with consistent depth throughout. Stainless steel returns are more difficult to bend cleanly and require more experienced operators.
For complex letter shapes (tight curves, diagonal strokes), the return may need to be fabricated in multiple sections joined by welding or riveting.
The back pan is cut (CNC or laser) to the letter outline. Holes are drilled for:
Power cable entry
Mounting stud positions
Drainage holes (to prevent water accumulation in outdoor installations)
The interior of the back pan is painted flat white to maximize LED light reflection.
The LED strip is cut to the required lengths and installed inside the letter on the back pan (for front-lit) or on the return (for halo-lit).
Critical for uniform face illumination:
Strip-to-face distance: 30–60mm (depending on letter depth and strip output)
Strip routing: Follow the letter perimeter shape; a single U-shaped strip in the bottom of the letter is NOT adequate for uniform illumination
Strip density: For a 100mm deep letter with COB strip, one run of COB strip on the back pan typically provides adequate uniformity
Calculate the total LED strip wattage in the letter. Select a LED driver rated at 125% of this load. For outdoor installation, the driver must be IP67-rated and mounted in a weatherproof location accessible for maintenance.
For large signs with many letters, consider centralized drivers in a weatherproof enclosure rather than per-letter drivers.
Connect the LED strip sections within the letter using clip connectors or soldered connections. Bring the power feed cable out through the back pan cable entry hole. Test the LED operation before assembly is completed.
Rivet or spot-weld the return to the back pan around the perimeter. Secure the face to the return using acrylic adhesive or mechanical retaining clips (clips allow face removal for future service access).
Before delivery:Power on and verify uniform face illumination (no dark spots, hot spots, or color variation)
Check all edges for clean lines — no return kinking, no face edge chips
Verify waterproof sealing of the cable entry and back pan joints (for outdoor letters)
Check mounting stud positions match the installation drawing